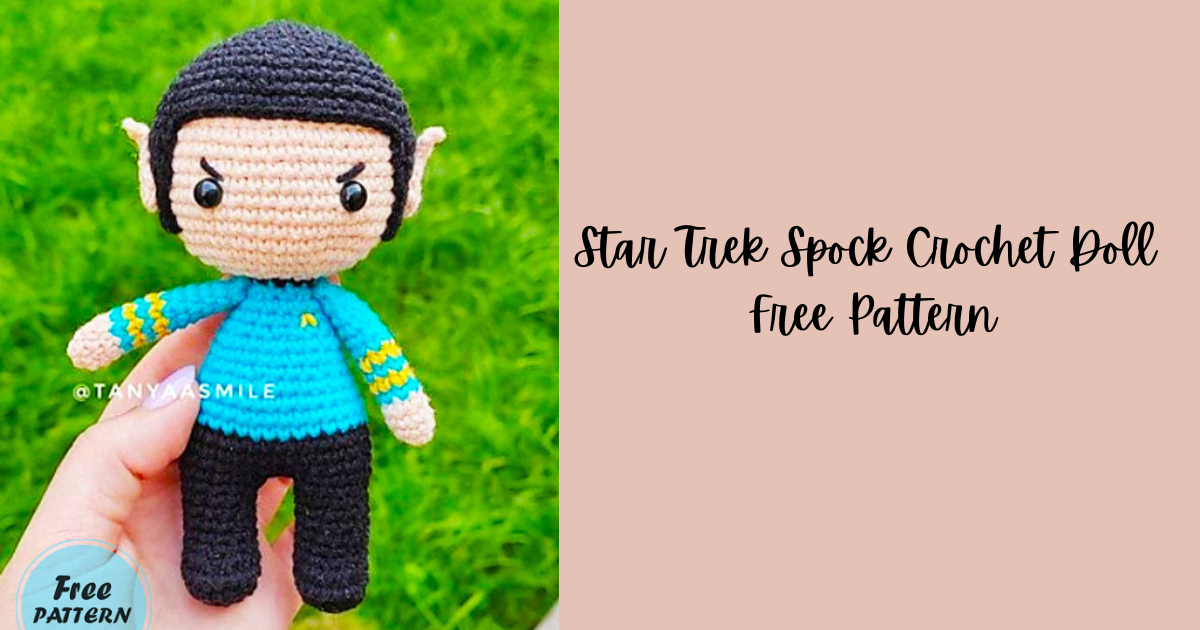

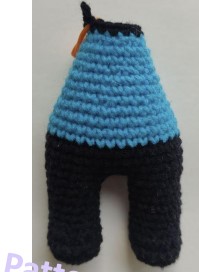
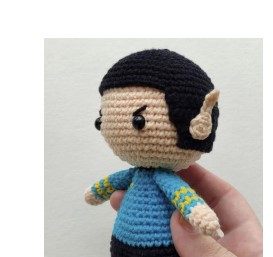
Friends, today I will share the Spock doll, which is a wonderful design from Tanyaasmile and which you all know from the Star Trek movie. There is actually no need to explain the doll too much because most of you should know who Spock is and what details he has. The important thing is that you can transfer these details to the toy perfectly. The doll, which looks very nice with its blue and black uniform, has yellow stripes on its arms, which is a clear indication that importance was given to this design.
We can say that the Spock amigurumi doll’s ears, which also bear the emblem of the Star Fleet to which it is attached on the left side of the doll’s chest, are very nicely designed.
Designer: tanyaasmile
Materials:
— 2.00 mm crochet hook.
— YarnArt Jeans (55% cotton, 45% acryl, 50g/160m), next colors: blue #33, black #53,
yellow #35, beige #73.
— 7 mm black safety eyes.
— Toys filler.
— Scissors.
— Tapestry needle.
— Pins.
— Stitch marker.
Approx. 15 cm (about 5.9 inches) tall using the materials stated in the pattern.
Abbreviations:
MR – magic ring
sc – single crochet
ch – chain stitch
sl st – slip stitch
inc – increase (stitch 2 times into the next stitch)
dec – invisible decrease (crochet 2 sc together using invisible method)
dc – double crochet
hdc – half double crochet
(…)х n – repeat instructions in brackets n times
R – round.
Notes:
– Crochet continuously in a spiral, unless otherwise specified. No need to close each row
with a slip stitch.
– In order to not lose track of the number of worked stitches in each round, use a stitch
marker to mark the beginning of each round. Numbers at the end of each round
indicate the total number of stitches that should be in that round.
– Tightly and gradually fill all the details of the toy in the process of crocheting.
Arm x2:
Crochet with beige.
1. 6 sc in MR (6)
2. (2 sc, inc)x2 (8)
3. – 4. 8 sc (8)
Continue on with blue.
5. 8 sc (8)
Continue on with yellow.
6. 8 sc (8)
Continue on with blue.
7. 8 sc (8)
Continue on with yellow.
8. 8 sc (8)
Continue on with blue.
9. – 14. 8 sc (8) Do not stuff of the arms. This way the arm doesn’t stick out too much
after sewing it to the body. Press the opening with your fingers, aligning
3 stitches side by side. Fasten off. Leave a long yarn to sew.
Stuff legs, body and head firmly, stuffing as you go.
Leg 1:
Start working with black yarn.
1. 6 sc in MR (6)
2. 6 inc (12)
3. (1 sc, inc)x6 (18)
4. 18 sc (18)
5. 6 sc, 4 dec, 4 sc (14)
6. 6 sc, 2 dec, 4 sc (12)
7. – 10. 12 sc (12)
11. Crochet 11 sc. Fasten off. Cut the yarn.
Leg 2 + Body:
Start working with black yarn.
1. 6 sc in MR (6)
2. 6 inc (12)
3. (1 sc, inc)x6 (18)
4. 18 sc (18)
5. 6 sc, 4 dec, 4 sc (14)
6. 6 sc, 2 dec, 4 sc (12)
7. – 10. 12 sc (12)
11. 12 sc (12) Don’t cut the yarn. Crochet 5 sc. Move the marker to the last loop.
Stuff the legs. Now we will start with the body.
12. ch 3, 12 sc, 3 sc, 12 sc (30) *ch 3, unite it to the first leg making 1 sc. Make 11 sc,
3 sc on the 3-ch-chain, 12 sc.
The beginning of your rounds should be on the back of the toy.
13. 9 sc, inc, 14 sc, inc, 5 sc (32) *inc should be on the sides.
14. – 16. 32 sc (32)
Continue on with blue.
17. – 18. 32 sc (32)
19. 9 sc, dec, 14 sc, dec, 5 sc (30)
20. 30 sc (30)
21. (3 sc, dec)x6 (24)
22. – 23. 24 sc (24)
24. (2 sc, dec)x6 (18)
25. – 26. 18 sc (18)
27. (1 sc, dec)x6 (12)
Continue on with black.
28. 12 sc (12) Stuff the body.
Now we are going to start crocheting the head.
Continue on with beige.
29. (1 sc, inc)x6 (18)
30. 18 inc (36)
31. (5 sc, inc)x6 (42)
32. (6 sc, inc)x6 (48)
33. – 42. 48 sc (10 rounds) (48)
43. (6 sc, dec)x6 (42)
44. (5 sc, dec)x6 (36)
45. (4 sc, dec)x6 (30)
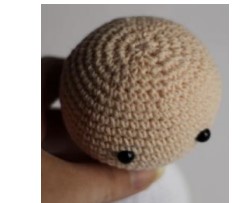
Place safety eyes between rounds 36 and 37, 9 st apart.
46. (3 sc, dec)x6 (24) Start to stuff the head.
47. (2 sc, dec)x6 (18)
48. (1 sc, dec)x6 (12)
49. 6 dec. Cut the yarn. Fasten off.
Hair:
Using black.
1. 6 sc in MR (6)
2. 6 inc (12)
3. (1 sc, inc)x6 (18)
4. (2 sc, inc)x6 (24)
5. (3 sc, inc)x6 (30)
6. (4 sc, inc)x6 (36)
7. (5 sc, inc)x6 (42)
8. (6 sc, inc)x6 (48)
9. (15 sc, inc)x3 (51)
10. – 12. 51 sc (3 rounds) (51)
13. ch 1, turn, 36 sc (36)
14. ch 1, turn, 36 sc (36)
15. ch 1, turn, 36 sc (36)
16. ch 1, turn, dec, 32 sc, dec (34)
17. ch 1, turn, dec, 30 sc, dec (32)
18. ch 1, turn, 32 sc (32)
19. ch 1, turn, dec, 28 sc, dec (30)
20. ch 1, turn, dec, 26 sc, dec (28)
Leave a long tail to sew to head.
Ear 1:
Using beige.
1. ch 7, start from 2nd chain from hook, 3 sl st, 1 sc, 1 hdc, (3 dc in one loop),
turn around 1 sc. Cut off leaving a long tail for sewing.
Ear 2:
Using beige.
1. ch 7, start from 2nd chain from hook, (3 dc in one loop), 1 hdc, 1 sc, 3 sl st.
Cut off leaving a long tail for sewing.

Finishing:
Sew the arms to the body symmetrically.
Sew the hair to the head.
Sew the ears to the head.
Embroider eyebrows above eyes.
Embroider emblem on shirt.
You are done! Congratulations